
Build Sheet
Overview
The Build Sheet screen is the primary form in VO, and the form where VV gets most of it’s information. It is a very wide form, and users should be alert that the buttons on the right side of the screen do not show up on some monitors without scrolling.
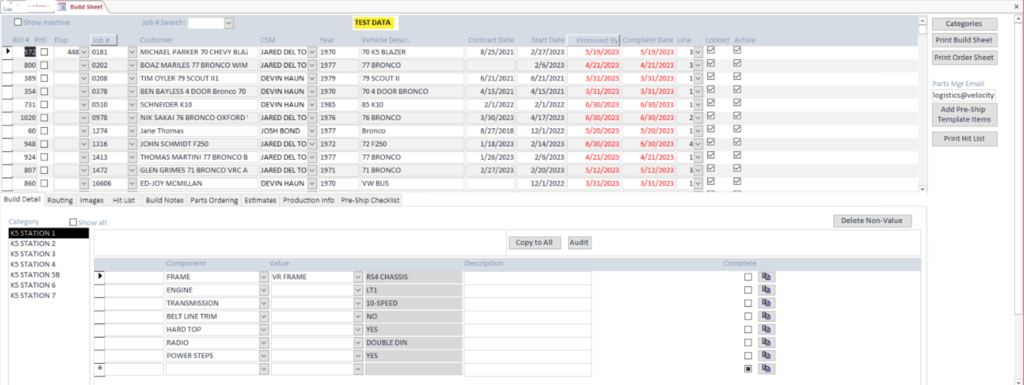
The top portion is a list of jobs, which can be selected using the Job # Search control, or by scrolling the upper half.
The bottom half are various tabs that have details about the specific Build. Note: Internally the form is based on the Builds table, which has a one to one relationship with the Jobs table. You select a Job, but you are actually working with a Build.
Features
Datasheet
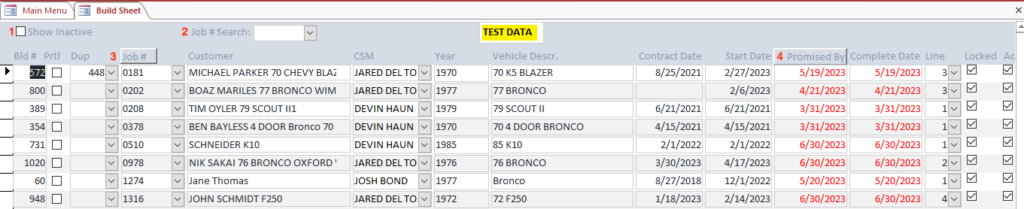
- Show Inactive – show all active and inactive Jobs. The default view is to show only active Jobs.
- Job # Search – search for a specific Job Number
- Job # button – sorts list by Job Number
- Promised By button – sorts list by Promised By date
- Columns
- Build # – system generated unique number for the Job
- Prtl – designates a Partial Job which will limit the number of tabs show in the bottom sections
- Dup – specifying a Job Number here will duplicate the specified Job to the selected Job
- Job # – the associated Job Number as previously defined in Table Maintenance / Jobs
- Customer – this field is editable, but will initially be auto-filled to match the information for the selected Job #.
- CSM – Customer Service Manager assigned to this Job – this field is editable, but will initially be auto-filled to match the information for the selected Job #.
- Year – the year model of the subject vehicle
- Vehicle Descr – short description of the vehicle type
- Contract Date – date the contract for this Job was accepted
- Start Date – date work on this Job was started
- Promised By Date – Completion Date promised for this Job – this will show in red if the current date is greater than 90 days before the Promised By Date.
- Complete Date – date this Job was completed – this will show in red if the current date is greater than 90 days before the Promised By Date.
- Line – if this is an Assembly Line job, specify the number of the Assembly Line here.
- Locked – do not allow further editing/configuration for this Job.
- Active – continue to show this Job in Velocity Office and Velocity View reports and forms
Tabs
Build Detail
The Build Detail tab displays a list of all of the Components on the selected Job.
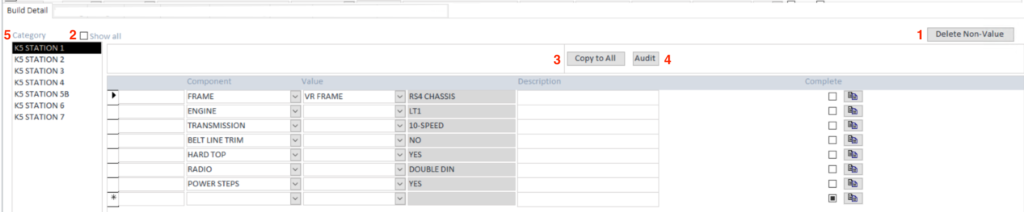
- Delete Non-Value – deletes all Components on this Job with no value assigned. This does not apply to Partial Builds.
- Show All – by default, only Categories with assigned Components will be displayed. Click this checkbox to display all Categories. This may be useful if you need to add a Component in another Category that is not yet on the Job.
- Copy To All – copies the subject Note to all other Categories on this Job
- Audit – displays a list of all Notes for all Categories on this Job.
- Category – the Category of Components you want to add/edit for this Job
- Columns
- Customer Builds
- Component – Component added to this Job ;Value – type of specified Component
- Description – description of specified Component
- Complete – designates that Component is completely installed – this value is also reflected in the Build Sheet Details section of Velocity View
- Copy Component button – copy Component values from another Job
- Partial Builds
- Description – description of specified Component
- Employee – employee responsible for installing Component
- Complete – designates that Component is completely installed – this value is also reflected in the Build Sheet
- Copy Component button – copy Component values from another Job
- Customer Builds
Routing
The Routing tab specifies what Routing Department and Labor Codes a Job will require and restricts employee clock-in activities to these specifications.
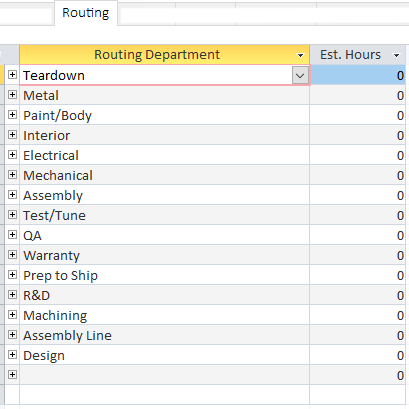
- Routing Department – the Routing Departments available for this Job. There is also a plus sign that is used to specify the Labor Codes available within this Routing Department.
- Est. Hours – the estimated number of hours to complete this Routing Department work to be used for budgeting purposes.
Images
The Images tab is used to add images to a Job. Images can also be added through the Velocity App.
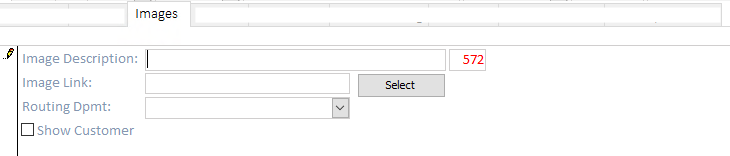
- Image Description – description for the image – ie. “Right Front Quarter Panel.”
- Image Link / SELECT button – click the SELECT button to upload an image. The Windows File Explorer window will appear. Since Velocity Office is running on a remote server, you will need to browse to the drive of your local PC. It will look something like “C – On [Your PC Name].”
- Routing Department – the Routing Department used to categorize this image.
- Show Customer – show the image to the customer in the Velocity Customer Portal
Hit List
The Hit List tab defines Hit List actions to be addressed for the job. These actions will appear in the Hit List area of Velocity View. There is also an option to print the Build Hit List.

- Item – description of the item to be addressed
- Labor Code – Labor Code this hit list action should be billed to
- Employee – employee assigned to this action
- Complete – checkbox designating completion of this action
- Completed By – employee designating this action as complete
- Completed On – date this action was designated as complete
- QC Checked – checkbox designating approval of this action after it is complete
- QC Tech – QC employee approving this action
- QC Checked Date – date this action was approved by a QC employee
- Repair Description – description of the repairs that was made
Build Notes
The Build Notes tab will display the notes associated with the Job that will show up in Velocity View. The date the note was entered and the employee entering the note is recorded and displayed to the right of the note.

Parts Ordering
The Parts Ordering tab displays a list of parts that need to be ordered for this job. This list is printed with the Print Order Sheet button.

Rcv All button – mark all items in this list as received. This will auto-fill the Rcvd Date and Rcvd By fields with the name of the current user and the current date.
- Part Category – category of the part to be ordered – will filter the following Component field to related items
- Component – the Component to be ordered
- Part Number – part number of component to be ordered
- Description – description of the component to be ordered
- Stock – designated an item that is normally a Velocity stock item
- Vendor – Vendor to order component from
- Date Ordered – date this component is ordered
- Exp Date – date this component is expected to arrive. An email notification will be sent to the person designated as Parts Mgr Email when a component has not be marked as received and the current date is one or more days beyond the Exp Date
- Rcvd Date – date the component is received
- Rcvd By – employee that received the component
- Comments – comment related to purchasing this component
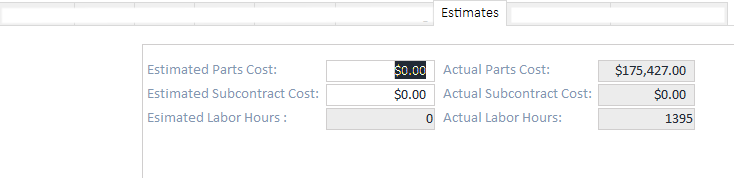
Estimates
The Estimates tab displays information used to drive over/under budget information in Velocity View.
Production Info
The Production Info tab is used for information used to drive the Production form in Velocity View
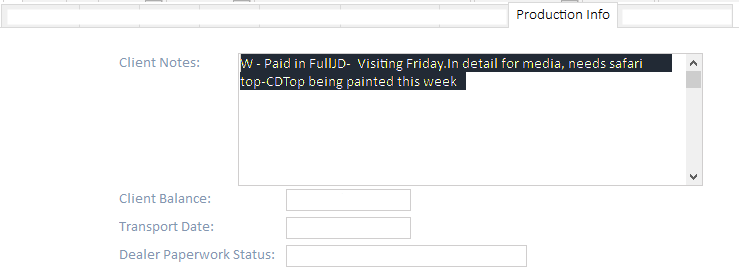
- Client Notes – notes that will show for this Job in Velocity View Production form
- Client Balance – client balance that will show for this Job in Velocity View Production form. This balance generates automatically each time the Velocity Office data is synced with QuickBooks
- Transport Date – Transport Date that shows for this Job in Velocity View Production form
- Dealer Paperwork Status – Dealer Paperwork Status that shows for this Job in Velocity View Production form
Pre-Ship Checklist
The Pre-Ship Checklist tab is a list of items that should be checked before shipping this job. The items can be manually entered or imported from a template using the Add Pre-Ship Template Items button.
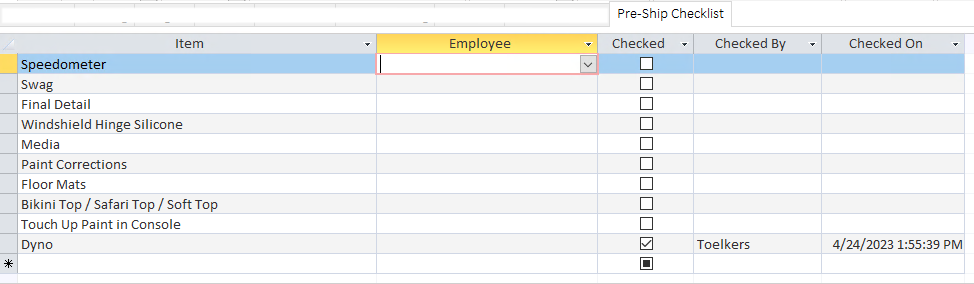
- Item – Item to be checked
- Employee – Employee checking the item
- Checked – designates completion of the item check
- Checked By – employee performing the check
- Checked On – date check was performed
Sales Info
The Sales Info tab is a informational aspect of the Build Sheet screen.
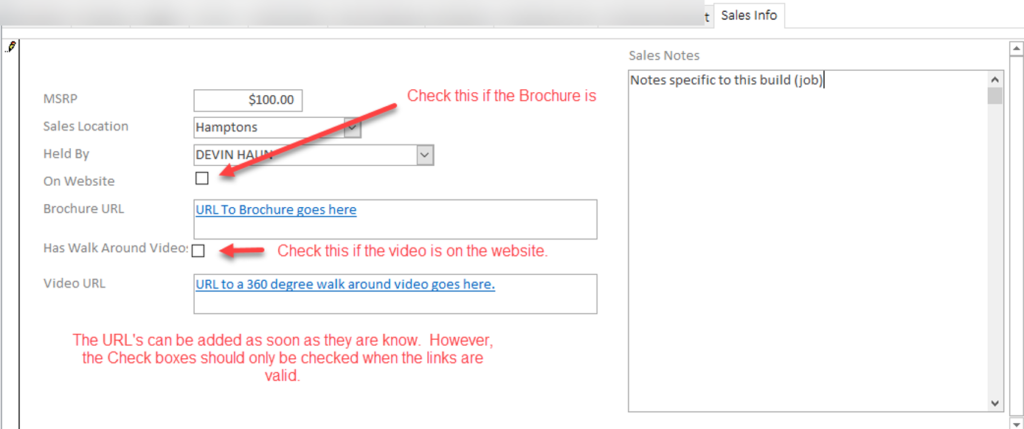
- Sales Locations can be dynamically added by typing in a new Location, then answering YES when prompted to add it. Users should be wary of spelling errors to avoid errors in data and information.
- Held By Names are those that have the Sales Rep checkbox checked for the Employee.
Right-Side Buttons
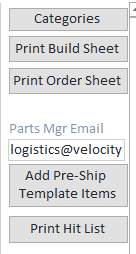
- Categories – Opens form for editing the Categories list.
- Print Build Sheet – Prints a report of build details with or without a watermark.
- Print Order Sheet – Prints a list of parts from the Parts Ordering tab.
- Parts Mgr Email –This email address will be the recipient of order reminders based on parts that are one or more days beyond the Expected Date as configured on the Parts Ordering tab.
- Add Pre-Ship Template Items – Adds items to the Pre-Ship Checklist tab for the currently selected build. These items are defined in Table Maintenance / Pre-Ship Template Items.
- Print Hit List – Prints a list of the items on the Hit List tab.